How To Use WordPress one-click Install on DigitalOcean Tutorial?
If you are a WordPress user, then you know that installing WordPress can be a bit of a pain. You have to download the files, unzip them, create a database, and then run the installation script.
But what if there was an easier way? What if you could install WordPress with just one click? Well, believe it or not, there is an easy way to do just that. In this article, I will show you how to use DigitalOcean one-click install to install WordPress on your server.
First, you will need to create a DigitalOcean account. Once you have created an account, you will need to add a Droplet. A Droplet is basically a virtual server. You can create one by clicking on the “Create” button in the top menu bar.
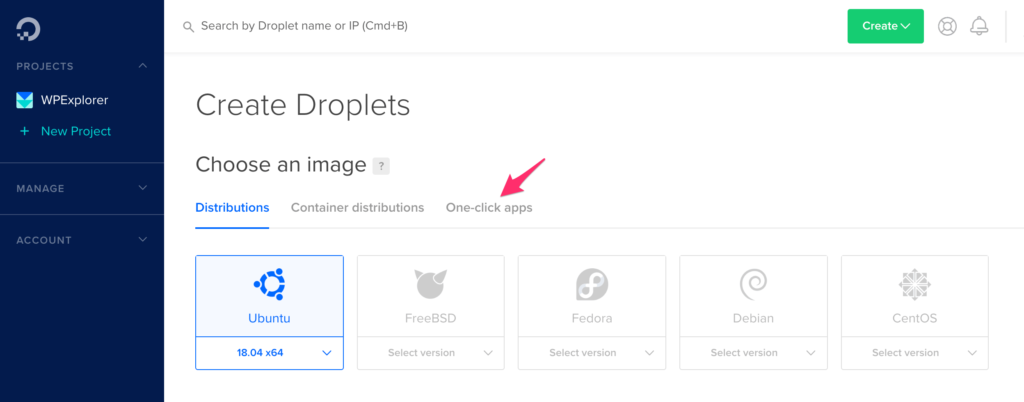
Once you have created a Droplet, you will need to select the “One-click apps” tab and then select the “WordPress” option.
Next, you will need to enter the following information:
- The name of your WordPress site
- Your site’s email address
- Your site’s password
- Select a region (I recommend selecting a region that is closest to you)
- Select a size (I recommend selecting the smallest size)
Once you have entered this information, click on the “Create” button. DigitalOcean will create your Droplet and install WordPress for you.
Within a few minutes, you will be able to log in to your WordPress site and start blogging!
I hope you found this article helpful. If you have any questions, please feel free to ask in the comments section below. Thanks for reading!
Everything is very open with a precise clarification of the challenges. It was really informative. Your website is useful. Thanks for sharing!